Intro
You savaged a fan from an old PC to use it as a ventilator? Just hook it up to 12V and the sucker runs. Well, it runs at a constant speed. Maybe too fast, maybe too noisy. There must be a possibility to slow it down.The idea
When you apply 12 Volts to it and then remove the power supply, it keeps spinning while getting slower. So if you continuously apply and remove the power, you can control the fan of the speed by the duration of the phases when the 12V is on and when it is not.What do we need
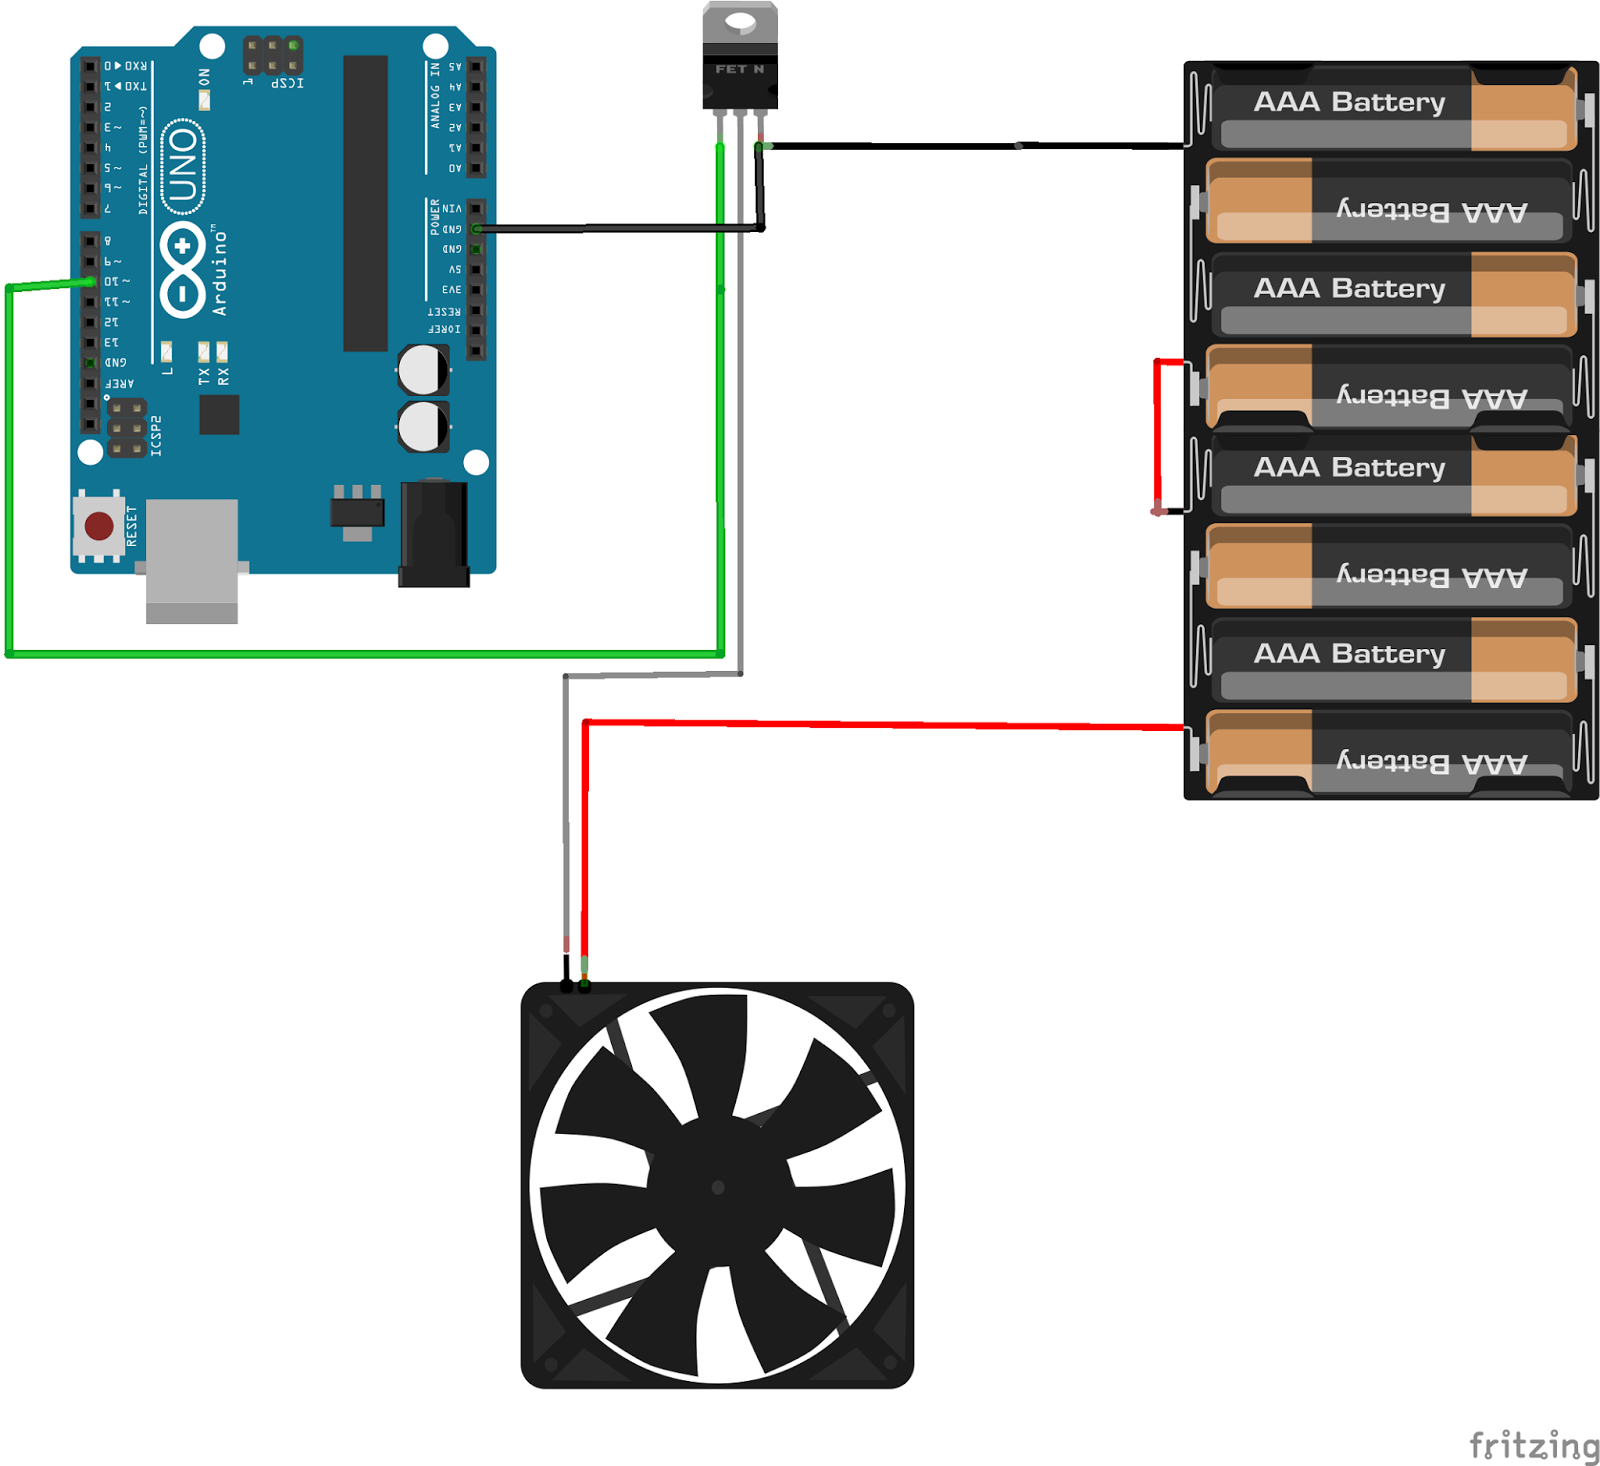
The Arduino doesn't supply 12 Volts. So we have to use some sort of switch. An electronic switch. A MOSFET. That's a kind of transistor, that can handle the needed current/voltage needed. I used the IRF530N, because it was the only Mosfet I had and it matches the specification of the vent by far ;-). It's a N-channel Mosfet. That means you can control the connectivity of the negative pole of the power source to the fan by applying a positive voltage.PWM
Pulse Width Modulation is the magic phrase. A digital output pin can only have two possible states. On or off. 1 or 0. HIGH or LOW. While HIGH is typically indicated by an output of 5 Volts (3.3 Volts occasionally) is LOW represented by a 0 Volt output. So how do we simulate an output of 2.5 Volts? Well, simply spoken, if we have a time frame of 10 seconds. Half the time we put out 5 Volts and half the time 0 Volts, we will have an output of 2.5 Volts of the time of those 10 seconds. Wired? Sure. But this is how math works ;-) | |
| PWM |
Video
Wiring
IRF530N at Amazon
PWM-Image
https://commons.wikimedia.org/wiki/User:MatthiasDD


